

Installing epoxy grout involves a few essential steps to ensure a durable and professional finish—particularly in industrial foundation grouting and heavy equipment applications. Unlike traditional cement-based grout, epoxy grout for machinery demands precise surface preparation and careful application due to its fast-setting properties and strength.
Below are the typical epoxy grout installation steps used to achieve optimal performance:
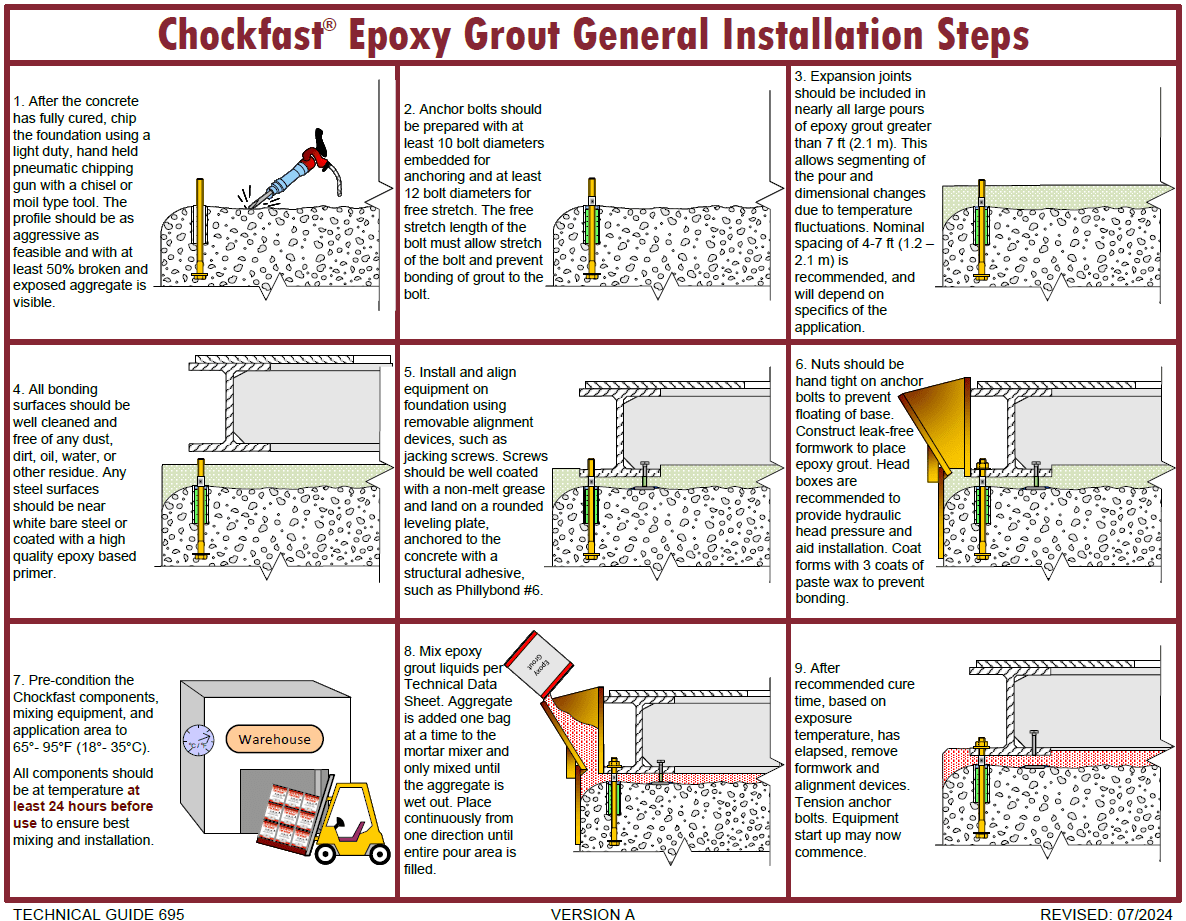
- After the concrete is fully cured, chip the foundation down 3/4 – 1″ using a light duty, handheld pneumatic chipper with a chisel type tool, removing all laitance and defective or weak concrete.
- Chamfer all the foundation edges at a 45° angle, in order to remove stress concentration.
- Remove all dust, dirt, chips, oil, water, and any other contaminants.
- The final baseplate or soleplate elevation should allow 2″ to 3″ of grout between the surface of the foundation and the lower baseplate flange or the underside of the soleplate.
- Fill the foundation anchor bolt sleeves with a non-bonding, pliable material, such as spray insulation foam to prevent the epoxy grout from filling the anchor bolt sleeve. Apply tape to the shanks and threads of all anchor bolts.
Grout Forming and Preparation
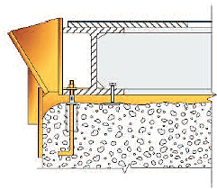
- Build grout forms out of 3/4″ thick plywood securely braced with 2×4’s. Forms must be liquid-tight. Seal off any open spaces or cracks in forms, or at the joint between forms and the foundation using RTV sealant.
- Install 45° chamfer strips along the top inside edges of the form at the final elevation of the grout as well as in all vertical corners.
- Install expansion joints as required based on the specific epoxy grout type and length of pour.
- Coat the inside of the forms with three coats of paste wax on all areas that will come in contact with the grout to keep the grout from bonding to the forms.
Baseplate Alignment and Mixing
- Install and align the baseplate without any pumps or motors installed using jacking bolts. Jacking bolts should fall on round metal landing pads epoxied to the sur face of the concrete. Apply a heavy coat of non-melt grease to the jacking screws so they can be removed later.
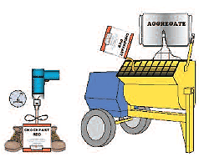
- Mix the epoxy resin and hardener with a Jiffy Mixer for about three [3] minutes. Pour the mixed solution into a wheelbarrow, mortar box, or mechanical mortar mixer.
- Slowly add aggregate to the mix one bag at a time. Mix the resin and aggregate only long enough to wet out all the aggregate.
Pouring and Curing the Grout
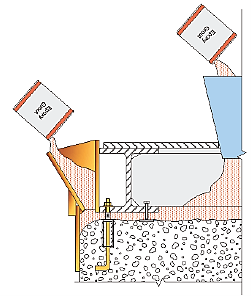
- Grouting should be continuous until all sections or compartments of the baseplate are completely filled. A head box can provide a hydraulic head to force the grout to the vent holes.
- The use of a head box provides a surge volume for the grout, as well as provides the critical hydraulic head.
- Tools and equipment can be cleaned with medium pressure water immediately upon completion.
Post-Grouting Procedures
- Forms may be removed when the epoxy grout has adequately cured. This generally occurs in approximately 24 hours at 72°F when the sur face becomes firm and not tacky to the touch.
- The baseplate is to remain supported by the jack screws for 48 hours before removing them. The jack screw holes shall be filled with RTV or epoxy after being solvent cleaned to remove any bond breaker. The foundation anchor bolts can now be torqued. The frame shall be dial indicated at each anchor bolt and coupling, to determine any movement during torque.
- Re-install the pumps and motors after the baseplate has been grouted and after the grout has cured for a minimum of twenty-four (24) hours.
ITW Performance Polymers represents the cutting edge of products which deal with epoxy grout installation and polymer system challenges. If you have questions or challenges that need solutions or need to know something else like Chockfast installation best practices, reach out to our Technical Services team. Industrial foundation grouting doesn’t have to be complicated, but it has to be done well so please reach out to our team for help.
By: Christopher Matthews-Ewald, Senior Applications Engineer and Sarah Vigue, Marketing Specialist
View all our Technical Data Sheets and Safety Data Sheets. Need some help? Ask a technical question and find a solution!
Further reading: Laying The Foundation For Success With Chockfast® Epoxy Grouting and Critical Machinery Installation In Cold Weather? Find Out How To Plan For Success.
For more stories like this, follow ITW Performance Polymers on LinkedIn and sign up for enewsletter in our website footer.